Table of Contents
Part 8: Setting up a NAS Server (Optional Configuration)
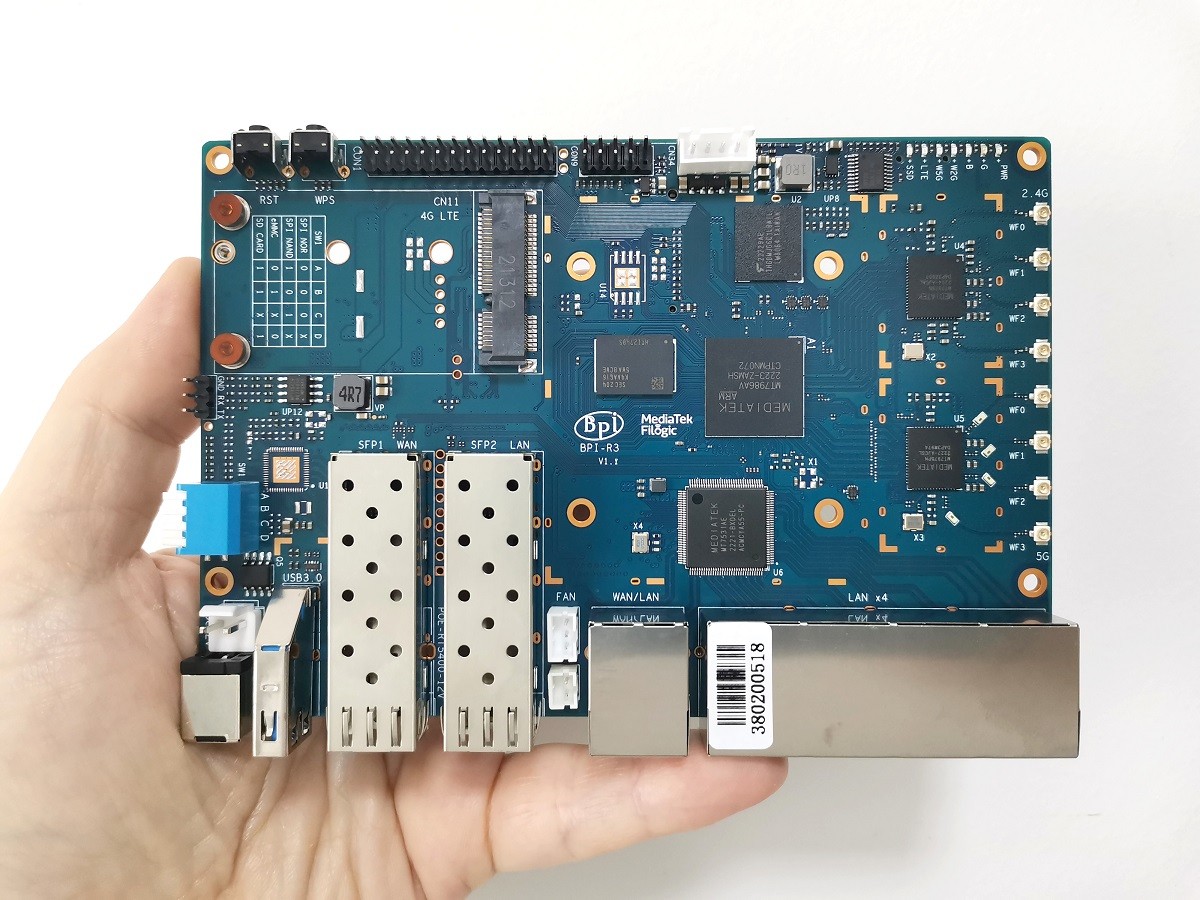
The Banana Pi R3 board offers plenty of interfaces and expansion slots. The M.2 Key M is an excellent choice to install an NVMe SSD or use it as a NAS device via an M.2 SATA expansion card. Cages for optical 2.5G SFP modules are another nice touch added to the R3 board. Still, it only adds a little value for a wired network connection area as the five Ethernet ports only support throughput speeds of 1Gbps. As an alternative configuration, if you don’t need an optical interface, you can also use a pair of 2.5 BASE-T Gigabit SFP to RJ45 modules.
How to set up a NAS device (Optional Configuration, DIY Style)
This upgrade might be helpful if you want to add multiple storage devices and connect them to the Banana Pi R3 Board. The things you need to buy are listed in the table below. For the 12V power supply output, you can use the VH3.96 Pins.
Before connecting any wires, use a multimeter tester to measure the electrical voltage.
Before connecting all cables to the R3 board, arrange them with a plastic sleeve with the desired diameter.
– Connect the power cable to the R3 board and the docking station.
– Connect the four SATA Cables to the external docking station.
NAS Configuration
Setting Up a NAS Device (Items list) | ||||
Item No' | Item Photo | Description | QTY | Buy Link |
1 |  | M.2 NVME M-Key PCIE 3.0 to SATA x5 port expansion Card | 1 | |
2 |  | 4 or 6 Slots Sata 2.5 Inch HD Rack | 1 | |
3 |  | VH3.96mm 2PIN Terminal Wire (With conector). | 1 | |
4 |  | 4-Pin Molex Peripheral Computer Cable | 1 | - |
5 |  | SATA 3.0 III Data Cables | 4 | |
6 |  | Corrugated Pipe. | 1 | |
AndroidPIMP.COM will not be liable or responsible for any loss or damage caused by improper wiring/assembly of the above components. | ||||
When you do recommend installing a passive (or active) heat sink to this setup? Passive cooling is I think a no brainer, it’s cheap and silent. Strange they don’t add passive heat sink to their package product, as part of the package.
“Strange they don’t add passive heat sink to their package product, as part of the package”.
They had some supply problems because of COVID.
If you have a large heatsink that will fit and cover all chips, it might be worth trying the passive cooling option. Just use a lower in height so you have the option to add a fan.
I just noticed that the “complete kit” also comes with heat sinks. Seperate heatsinks for each chip. If you buy a large heatsink, that will work as well, BUT keep in mind that the chips have different heights, meaning you should use different heat pads (1.5 mm and 0.5 mm) to have a good coverage of the heat sink on the different chips. I did read about performance issues on forum.banana-pi.org forum, when you don’t cool the chips enough. Especially with passive cooling, it might still be a good idea to add additional vent holes manually in the casing. Since… Read more »
So use 1.5-2 mm thermal pads. Nothing will happen. They are elastic, so it does not matter if you are using the highest type for all chips. It’s not rocket science. I agree about the vent holes. You can drill a few holes.. or you can also glue a small fan to the bottom of the case. And maybe use the GPIO header pins as a power source. Just to get the hot air out of the case.
Actually there is a fan header connnector on the R3 board. Which can do PWM.
Kindly Try it, and let me know if it works well.
you can email me with the info. Thanks
Ps. also add a link to the package deal of the Banana Pi BPI-R3? https://www.aliexpress.com/item/1005004886608696.html.
Since you mentioned the single board computer only on your last page.
Thanks. I added the link for the complete kit.
Which version of PCIe does the board support?
According to MediaTek website >> M.2 M-Key PCIe interface (2-lane PCIe 2.0)
Is there any nas software or docker image that will handle those multiple hdds ? Exampme if i want to raid, zfs or btrfs
1) OpenWrt has NAS support.
2) You can also try CasaOS.
3) OpenMediaVault should run on Debian.
I don’t get what is about the ONTi SFP. It is suposed to be a GPON ONT? In aliexpress I see that it comes in pairs (Tx 1310 and Rx 1550 the first one and other with Tx 1550 and 1310), like a pair which is meant to be connected together.
https://es.aliexpress.com/item/4000265957277.html?spm=a2g0o.productlist.main.17.5893oPf4oPf4kf&algo_pvid=54d3e4cb-00c6-4269-8acb-3ae1e2c40f54&algo_exp_id=54d3e4cb-00c6-4269-8acb-3ae1e2c40f54-8&pdp_npi=4%40dis%21ARS%217735.49%213867.74%21%21%2122.10%21%21%402132a26216964772264216569ed485%2110000001076765699%21sea%21AR%214647643211%21AB&curPageLogUid=VmCG7Kwqm2TR
This module is not compatible with GPON technology.
If the module information / specifications do not indicate it’s a GPON compliance, then it is safe to say that it is not GPON compliant.
Did you use anything to glue the copper-made sheet plates on chips?
I used a thermal silicone adhesive plaster.