
Part 2: youyeetoo R1 Metal Case Review
Unboxing (Package Content)
- x2 mounting brackets.
- x1 Thermal Pad (17x17mm).
- X1 Metal Enclosure for the R1 board.
- x12 Philips screws (M2.5 x 6).


A Closer Look at the Metal Case


Design
The Pros
Overall, the main design of the case is quite good and effectively meets its intended purpose. The design concept hinges on the principle of heat convection, utilizing the upper cover that is equipped with built-in fins to promote the efficient dissipation of heat. This thoughtful incorporation not only enhances the aesthetic appeal of the case but also plays a vital role in maintaining optimal temperatures for the components housed within. Therefore, the combination of form and function in this design ultimately contributes to its overall effectiveness.
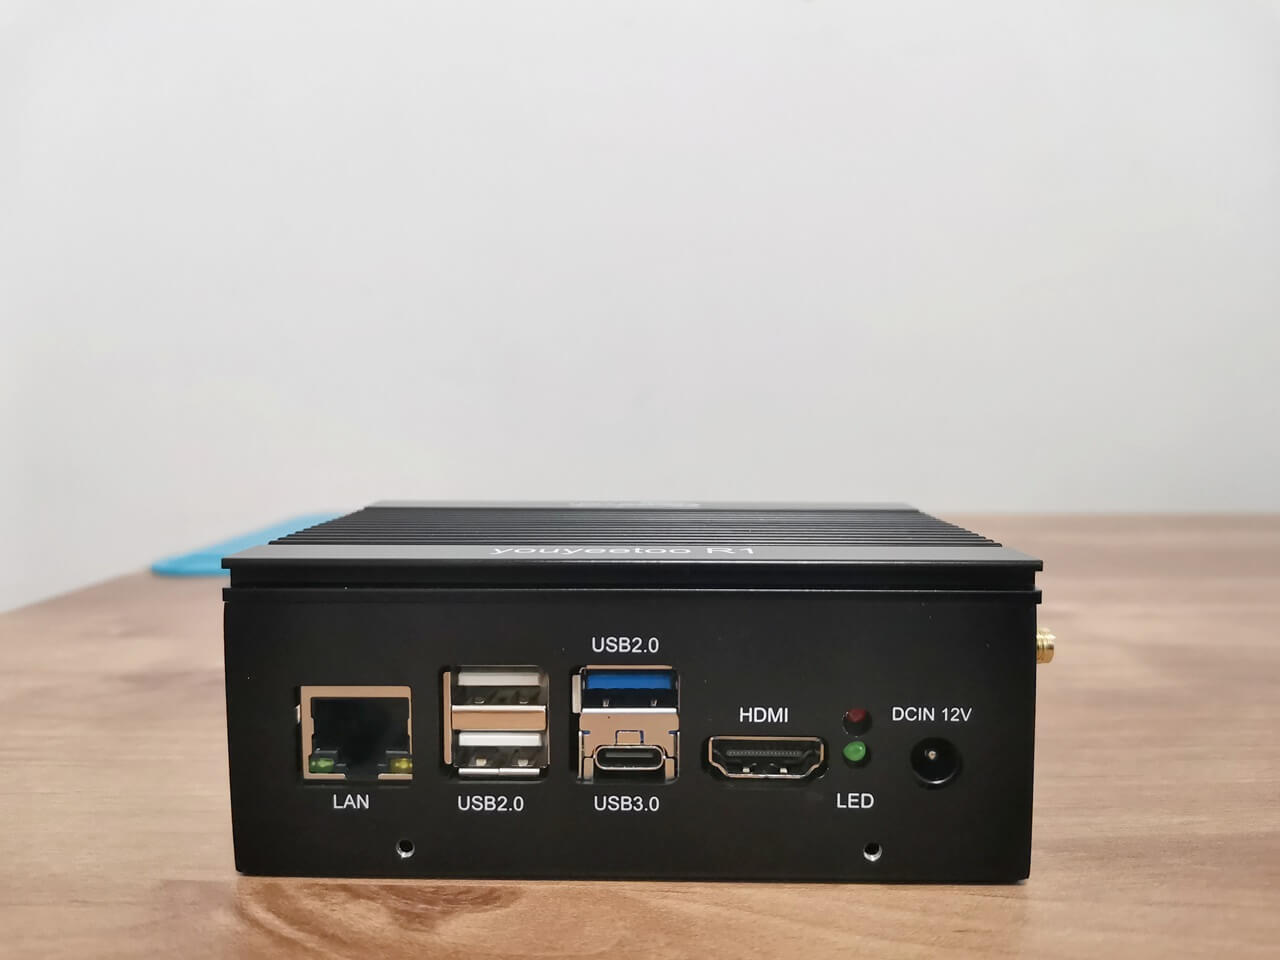
Interfaces/ports access
Users will be delighted to discover that the case’s interfaces and ports are fully accessible, eliminating the hassle of frequently unscrewing and opening the cover. The thoughtfully designed cutouts provide effortless access to all ports, enhancing convenience and usability.
The Cons
The circular cooling island, seamlessly integrated with the main cover, provides direct contact only with the primary RK3588S SoC. Unfortunately, other components, such as the memory chips, do not benefit from this cooling solution. To effectively cool these memory chips, it is advisable to employ copper shims that match the appropriate thickness and dimensions. For the remaining chips, including the USB controller and Ethernet chips, it is highly advised to consider using small copper heatsinks measuring 6 x 6 mm in size.
Mounting Brackets
One of the standouts features of this case kit is the inclusion of a pair of mounting brackets. These versatile brackets allow you to orient the case both horizontally and vertically on nearly any surface that has holes. They are securely attached to the case using four Phillips screws, making it incredibly convenient for wall mounting or situating the device in various industrial environments.
The metal enclosure with attached metal brackets


Installing the youyeetoo R1 Board
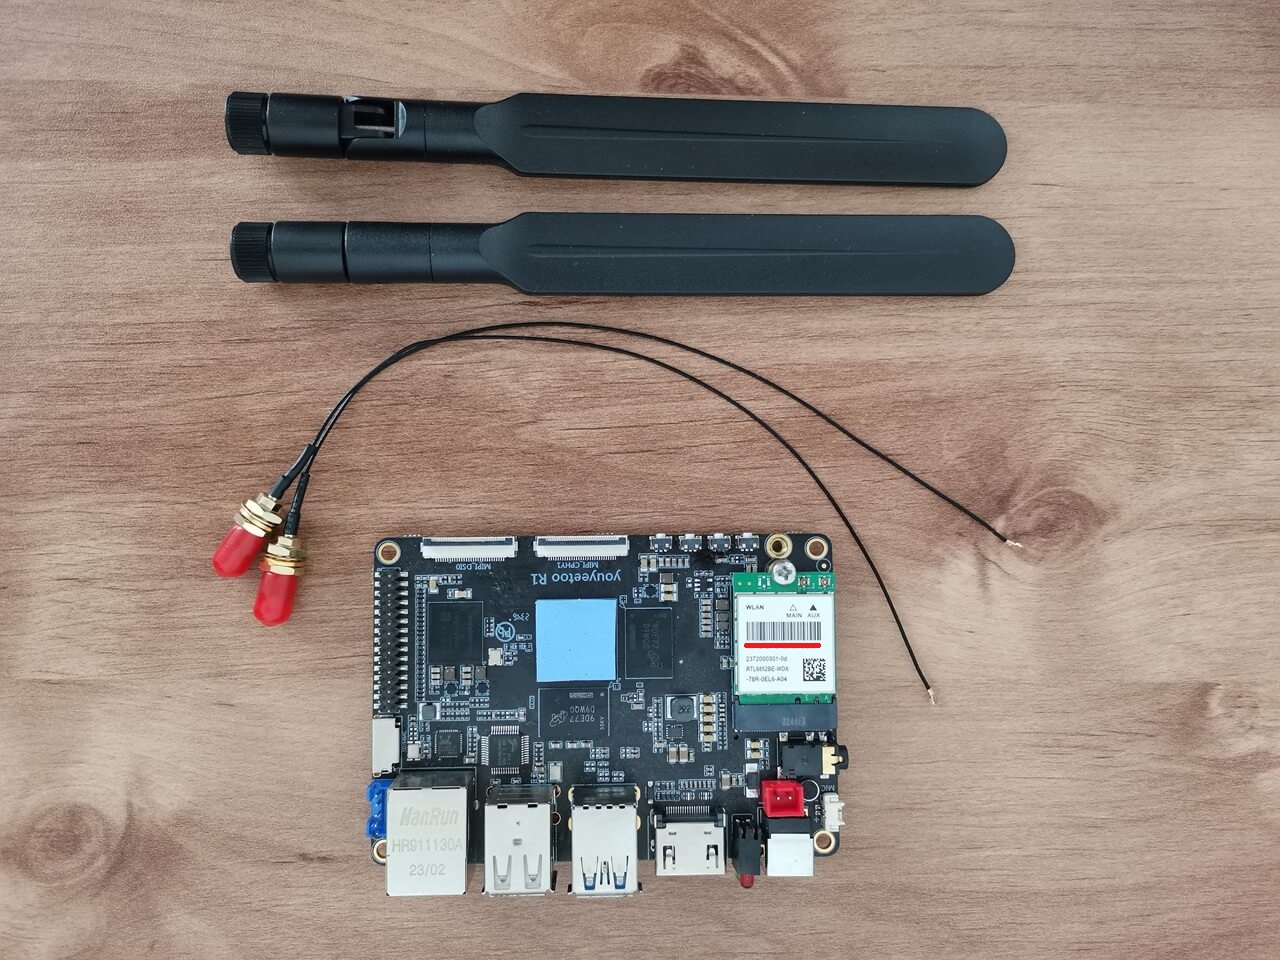
The R1 board comes in two distinct editions: the previous (older design) model with an M.2 2242 NVMe SSD/4G LTE socket, and the enhanced new V3.0 version, which has been replaced with an M.2 2280 form-factor socket, greatly increasing compatibility for mounting widely used 2280 type NVMe cards. The newer updated model also includes a few major improvements, for example, two USB 3.0 Type-A host ports, compared to the previous version, which offered one USB 2.0 port and one USB 3.0 port. Additionally, this metal case kit doesn’t come with any Wi-Fi wires or antennas. therefore, you’ll have to buy those separately, depending on the Wi-Fi/Bluetooth card you have installed in your M.2 E-key socket.
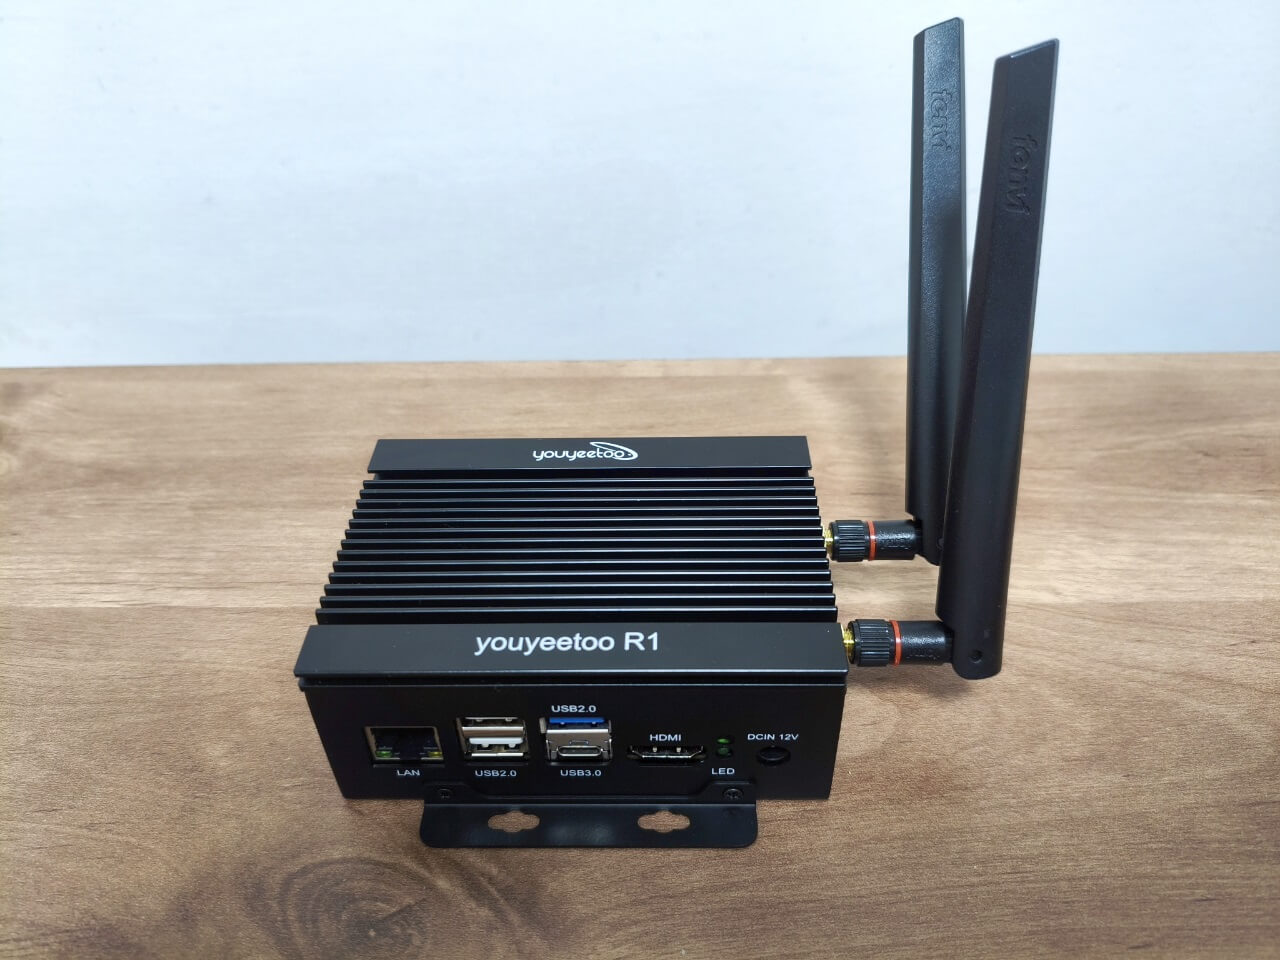
Assembling the Case with the R1 Board
The final outcome, illustrated in the photos below, exceeds all expectations, showcasing a well-crafted metal enclosure. For those interested, the Wi-Fi card and antennas can be purchased separately on the YouYouToo website. Furthermore, the images reveal that we have incorporated additional heat sinks onto the eMMC flash chip, USB controller, and Ethernet controller to improve cooling performance.


Measuring temperatures
Under typical non-intensive usage, you can expect the state of charge (SoC) temperatures to range between 33°C and 38°C. This is quite impressive, especially for a heating system that relies on passive cooling without a spinning fan.
| Thermal Zone | Adapter | Temperature |
|---|---|---|
| npu_thermal-virtual-0 | Virtual device | +33.3°C |
| center_thermal-virtual-0 | Virtual device | +34.2°C |
| bigcore2_thermal-virtual-0 | Virtual device | +33.3°C |
| package_thermal-virtual-0 | Virtual device | +34.2°C |
| gpu_thermal-virtual-0 | Virtual device | +33.3°C |
| littlecore_thermal-virtual-0 | Virtual device | +33.3°C |
| bigcore0_thermal-virtual-0 | Virtual device | N/A |
The temperatures listed in the table were recorded at an ambient temperature of 20°C.
Stress testing
In this test, we utilized stress-ng in conjunction with lm-sensors to stress the hardware every 30 seconds between each assessment, escalating the CPU tasks from 1 to 8. As demonstrated in the table below, our maximum peak temperature readings ranged from 51.8°C to 57.3°C.
| Thermal Zone | Test No. 1 1 CPU Tasks | Test No. 2 2 CPU Tasks | Test No. 3 3 CPU Tasks | Test No. 4 4 CPU Tasks | Test No. 5 5 CPU Tasks | Test No. 6 6 CPU Tasks | Test No. 7 7 CPU Tasks | Test No. 8 8 CPU Tasks |
|---|---|---|---|---|---|---|---|---|
| npu_thermal-virtual-0 | +35.2°C | +37.9°C | +42.5°C | +45.3°C | +48.1°C | +49.9°C | +51.8°C | +51.8°C |
| center_thermal-virtual-0 | +36.1°C | +38.8°C | +43.5°C | +46.2°C | +48.1°C | +49.9°C | +51.8°C | +51.8°C |
| bigcore2_thermal-virtual-0 | +36.1°C | +40.7°C | +46.2°C | +49.0°C | +51.8°C | +55.5°C | +56.4°C | +57.3°C |
| package_thermal-virtual-0 | +36.1°C | +39.8°C | +44.4°C | +47.2°C | +49.0°C | +52.7°C | +53.6°C | +54.5°C |
| gpu_thermal-virtual-0 | +35.2°C | +37.9°C | +41.6°C | +44.4°C | +46.2°C | +48.1°C | +49.9°C | +49.9°C |
| littlecore_thermal-virtual-0 | +36.1°C | +37.8°C | +44.4°C | +48.1°C | +49.9°C | +53.6°C | +55.5°C | +55.5°C |
| bigcore0_thermal-virtual-0 | +36.1°C | +40.7°C | +46.2°C | +49.0°C | +50.8°C | +55.5°C | +56.4°C | +57.3°C |
Final Words
The R1 meta case is definitely worth the investment, as it not only offers excellent value for its price but also ensures that your board remains well-cooled during use. Additionally, the design provides robust protection against any potential damage, making it an ideal choice for those who prioritize both performance and safety. With its thoughtful features and effective cooling capabilities, this case stands out as a great option for users. Overall, it’s a smart buy for anyone looking to upgrade their current R1 setup.
Price and Availability
The R1 is now available for just $13.65 on the company’s official website (antennas not included). Furthermore, if you’re interested in exploring the features of the R1 board, its accessories, and a variety of other awesome products, we highly recommend visiting the official youyeetoo website for more information.
About youyoutoo
Founded in 2012, youyeetoo specializes in the R&D, sales, and manufacturing of IoT, edge computing, and robotics hardware and software. We offer diverse product options for development and DIY makers, along with customized R&D services. Our products include embedded mainboards, SoMs, SBCs, and industrial PCs based on ARM/x86 architecture, utilized in automotive, medical, IoT, and industrial sectors to support evolving economies.
Communication Channels and Inquiries:
- Tel: +86 186 6539 9520
- E-mail: [email protected]
- Skype: smartfire_cn
- Twitter/X: https://x.com/youyeetoo
- Facebook company page: Youyeetoo
- LinkedIn: https://www.linkedin.com/company/youyeetoo


